 ______     __  __     ______     __    __  ______     ______    __
/\  ___\   /\ \/ /    /\  __ \   /\ \  / / /\  __ \   /\__  _\  /\ \
\ \___  \  \ \  _'-.  \ \ \/\ \  \ \ \/ /  \ \  __ \  \/_/\ \/  \ \ \
 \/\_____\  \ \_\ \_\  \ \_____\  \ \__/    \ \_\ \_\    \ \_\   \ \_\
  \/_____/   \/_/\/_/   \/_____/   \/_/      \/_/\/_/     \/_/    \/_/
Author: Skovati, Date: 2020-12-28
In this chapter, I’ll talk about the four main ways I recommend installing and getting started with Linux, in order from most-preferred to least-preferred.
This option definitely seems the scariest to newcomers, but installing Linux along side whatever other operating system you have installed on your most used computer is easily the best way to get yourself to actually use Linux on a daily basis, rather than installing a VM that you forget about in a week. A few things before we get started:
Backup any important information on the hard drive you want to install on―you won’t lose any data if you follow these steps, but you can never be too safe.
Make sure you have enough free space on that hard drive. A Linux install like Ubuntu or Linux Mint will take up around 10 gigs, but it’s nice to have some extra space for installing packages and keeping media downloaded. I recommend having around 32-64 gigs free.
Choose your Linux distro you want to use. Ubuntu is the de facto starting place for beginners, although Linux Mint is another good recommendation.
Assuming you picked Ubuntu, go to the download page and grab the latest ISO for your system architecture (which is probably amd64). Alternatively, if you want to try a different desktop environment (read Chapter 3 if you haven’t already), you can check out the different Ubuntu flavors, that include DEs like KDE Plasma, LXDE, and Budgie.
Next, you’ll need a USB drive. I’d recommend at least 8 gigs, as some of these Ubuntu images can get pretty big (current release is 2.7 gigs). Make sure there isn’t anything important on it, and then download my preferred flashing utility, Balena Etcher. Download and run that .exe (hopefully that’s the last time you have to do that), and insert your USB stick. Open Etcher, choose your USB (be careful to choose the right one), select your Ubuntu ISO, and hit flash. Once that’s done, you’ll need to make sure your computer’s BIOS is configured to boot from a USB stick before it boots from an installed hard drive; search around if you aren’t sure how to do this. Once the BIOS is configured, insert your USB and reboot. You’ll be greeted with the Ubuntu installer, which will walk you through the process. I won’t go into detail here, just make to click the “install along side existing OS” option when you’re choosing the hard drive to install to. This will partition your disks, and add your Windows install to the bootloader, so you can choose which OS to boot every time you turn your computer on. I recommend watching this video to get a feel for the installation. Once the installer is done, just reboot your computer and choose Ubuntu on the GRUB bootloader screen!
This option is perfect for those looking to run any server applications. Grabbing a $35 Raspberry Pi is a perfect way to learn about Linux servers, networking, security, SSH, hosting a website, and more. If you’re looking for a more powerful option—maybe to run a Minecraft or Plex server—I highly recommend looking at used old Dell business computers like the Optiplex, which is what I’m currently using for my server applications, including hosting this very blog. Once you have acquired some hardware, follow the steps above, but use a server oriented distro, like Ubuntu Server or Debian. We will cover securing a Linux server in a later chapter.
This option is available for anyone, no additional hardware is needed. Many companies like Digital Ocean or Google’s Cloud Platform offer free to use, small Linux VMs. These VMs really are tiny—the one I recommend is the “f1-micro”, which has one shared CPU core and 500 megs of RAM. While this isn’t much, it’s plenty to learn the basics of the Linux command line, and enough to run a simple website or VPN from.
I’ll walk through the steps to set up this VM on Google Cloud:
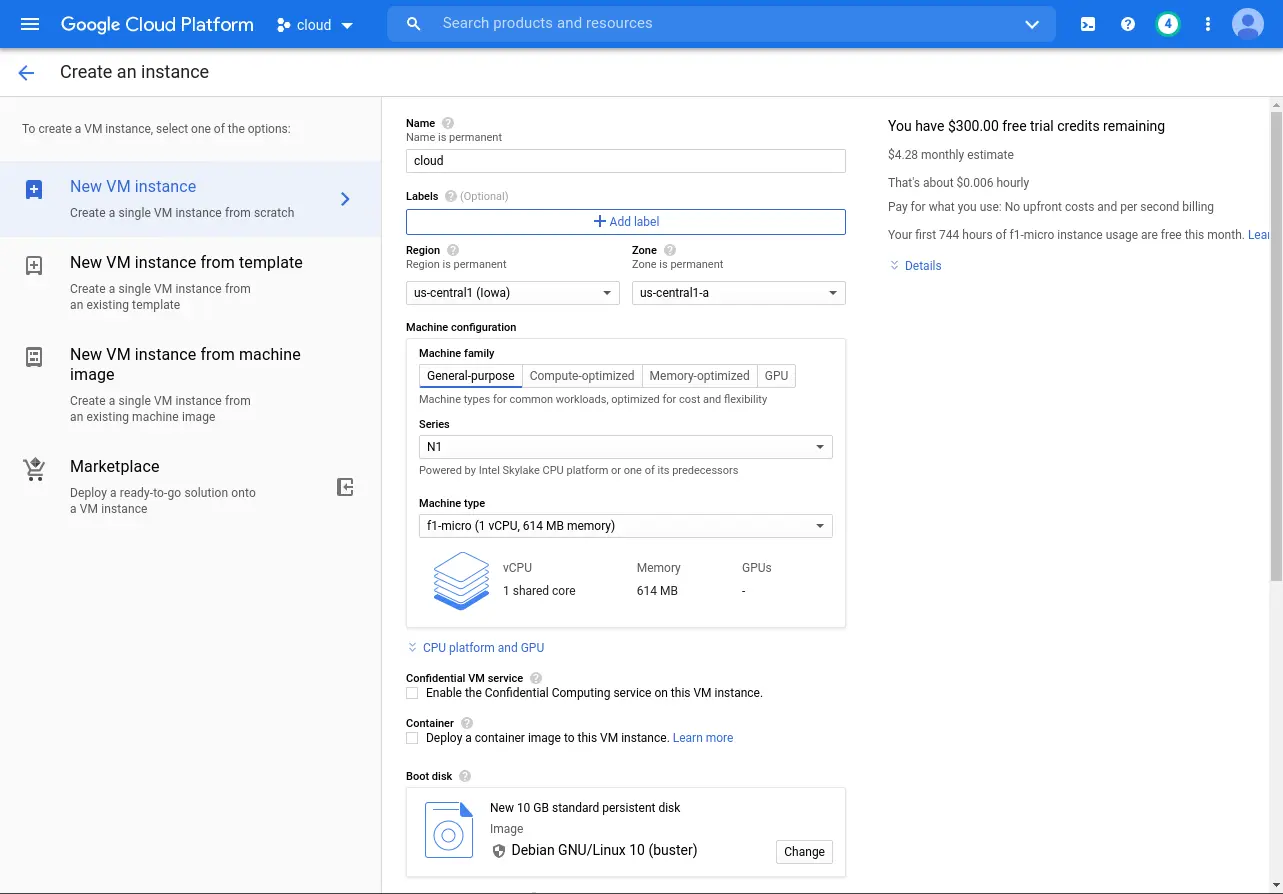
First, either sign in with your existing account, or make a new account here. Make a new project at the top, called something memorable like “Linux VM” and select it. Then, on the left side, select Compute Engine. Select your project, add your payment information (you won’t be billed anything though), and the hit create VM. Under machine configuration, choose generation N1, and under Machine type, choose f1-micro. GCP gives everyone 744 free hours of f1-micro usage per month, which is exactly 24 hours a day * 31 days in a month—so this VM is indefinitely free for you to use. You also get $300 free credit towards other GCP services if you want more horsepower. Next, under Boot Disk, I recommend choosing either Ubuntu Server or Debian 10. Ubuntu Server is going to be easier for newcomers, while Debian has less configured out of the box. Then, hit create and wait a few seconds. Soon your could VM will be up and running.
Go back to your VM instances page, and you should see your new server. There are a handful of ways to connect to this server: SSH through the GCP interface, using the gcloud command line tool, or SSHing manually through a program of your choice. I recommend learning how to access it from a ssh client, but you should use the GCP ssh interface at least once to see what your username is on the VM. Both Linux and Windows have an SSH client built into the terminal and PowerShell respectively. If you’re familiar with SSH, generate a key pair and continue reading, if not, skip ahead to the first part of Chapter 5 where I talk about what SSH is and why you should use SSH keys.
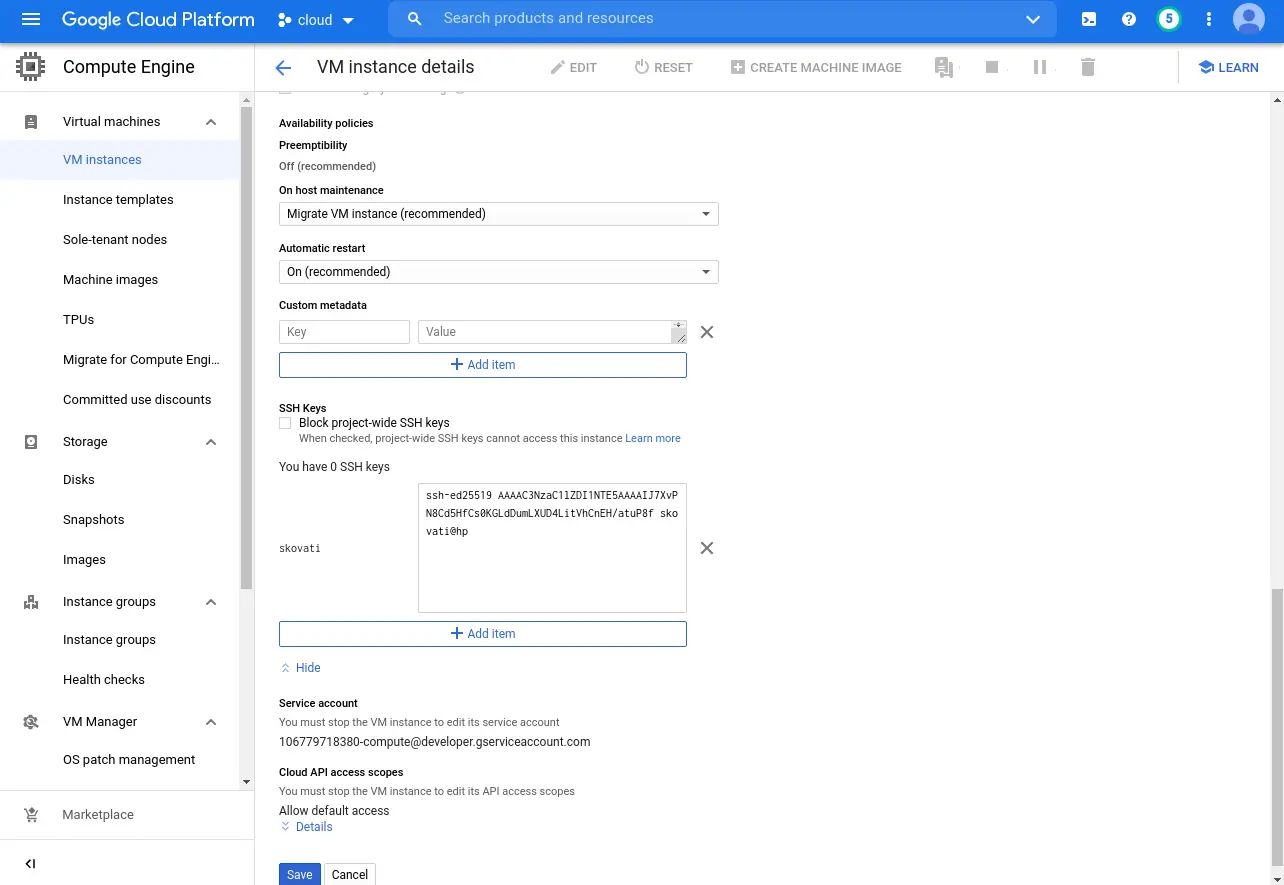
Once you have an ssh key pair generated, you’ll have to add your public key to the GCP VMs whitelist. This is done by clicking on your VM in the VM instance list, and hitting edit on the top bar. Scroll down to the SSH key section, hit view and edit, and paste your ssh public key in here. Now, you should be able to access your VM by typing ssh your-google-username@the-vms-ip-listed-on-the-instances-page and boom! Remote secure shell access. Once you have this working, move onto the other parts of Chapter 5 where I talk about other server configuration.
I have nothing against running a VM, I just think it’s far too easy to install it once and forget about it after a week compared to installing it on your own machine or buying a Raspberry Pi. That being said, using a VM service like Oracle’s VirtualBox is a fool-proof way to quickly get a Linux environment up and running. This is perfect if you want to try out different distros or desktop environments, or just want to see what Linux is about before installing it on a personal machine. I won’t go into detail about how to setup a VM here, there are many other tutorials online.
Chapter 5 - Configuring Your Linux Server
last modified: (a683bf1)
the content for this site is CC-BY-NC-ND
the source code is MIT